
Quick Steps:Add a Student Link1. Login to CASHNet with your existing Third Party User ID and password.2. Open the email invitation, and find the user ID and temporary password. 3. Click "My Account" in the menu, and "Add New" in the Student Links section. 4. Enter the user ID and password from the email; then click "OK." 5. Verify the student is added to the Student Links section. Update a Student Link1. Login to CASHNet with your existing Third Party User ID and password.2. Open the reset email, and find the user ID and temporary password. 3. Click "My Account" in the menu, and "Update" in the Student Links section. 4. The user ID is pre-filled. Enter the password from the reset email; then click "OK." 5. Verify the student’s name is an active link by clicking it to switch accounts. Remove a Student Link1. Click "My Account" in the menu, and "Remove" for the specific Student Link.2. At the pop-up prompt, click "OK to confirm removal, or "Cancel" to escape. 3. Verify the user ID is removed from the Student Links section. |
IMPORTANT: After the first/only student invites you to CASHNet, you finish setting up your account by changing the password and adding security information. Thereafter you login to CASHNet with the first user ID and the updated password.
A second/additional student may invite you to CASHNet (for example, if you have two children attending UCI). The new invitation contains a different user ID and temporary password. You DO NOT use this information to login or to finish setting up a second account.
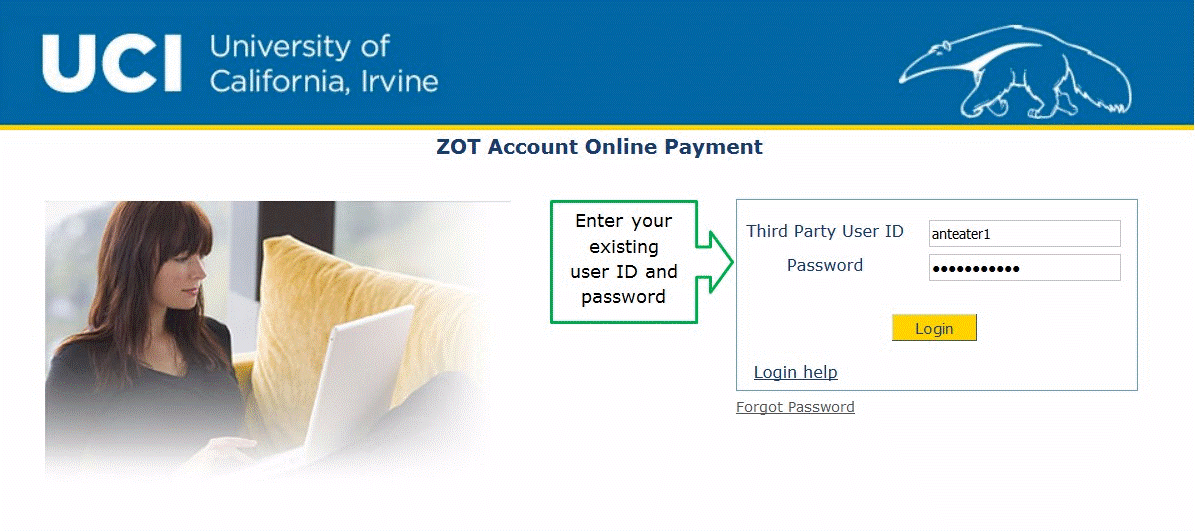
1. Login to CASHNet with your existing user ID and password.

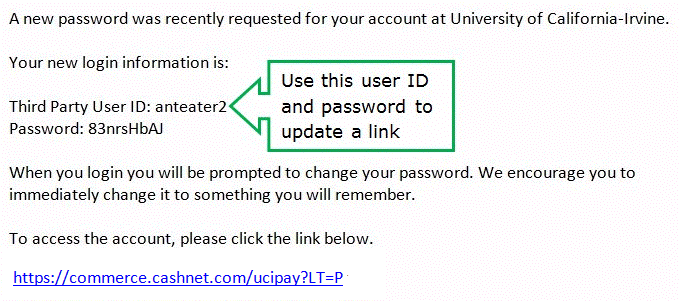
2. Open the email invitation from the second/additional student to find the user ID and temporary password. You need this information to create a link. DO NOT use this user ID and password to login to CASHNet.
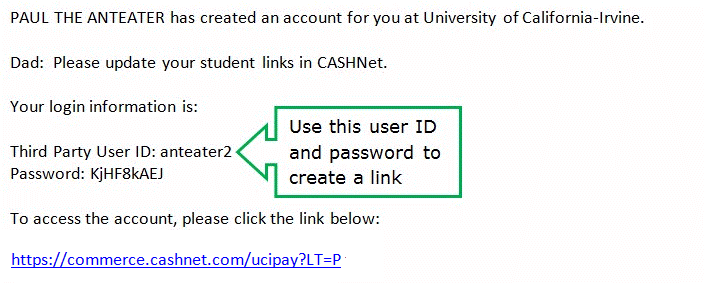
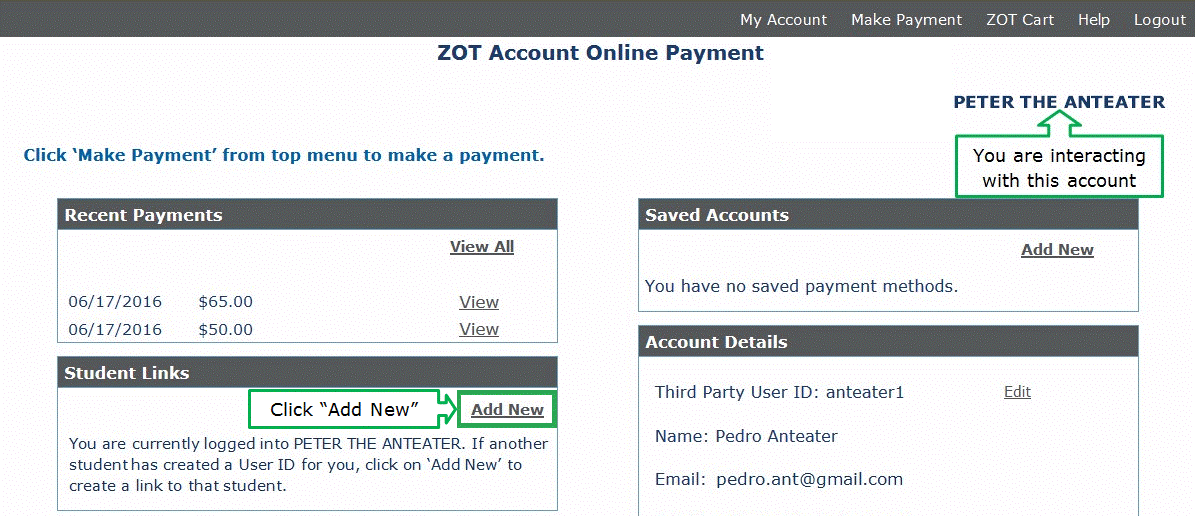
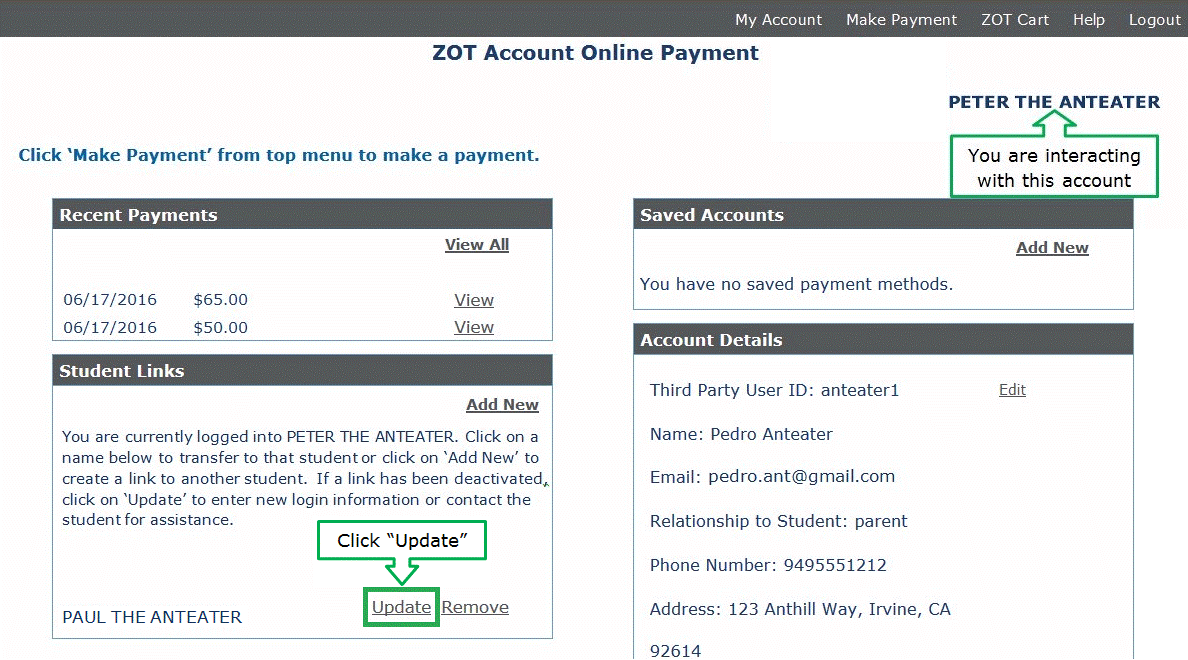
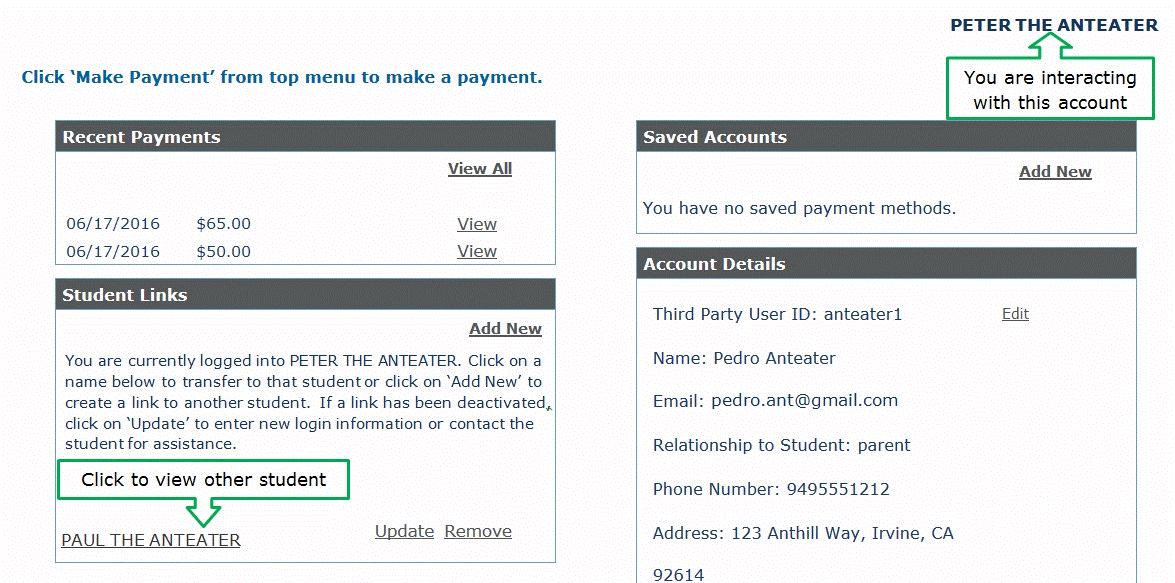
3. You are working with the student account named in the upper-right corner of the page. Click on "My Account" in the menu. The account page is divided into four sections. Click the "Add New" link in the Student Links section.
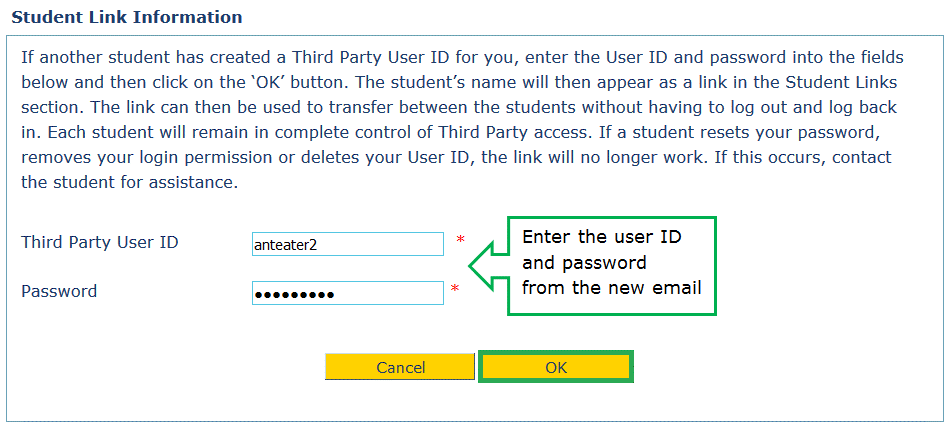
4. Now enter the user ID and password from the new email invitation. Click "OK" to save the information and create a link to the second student’s account.
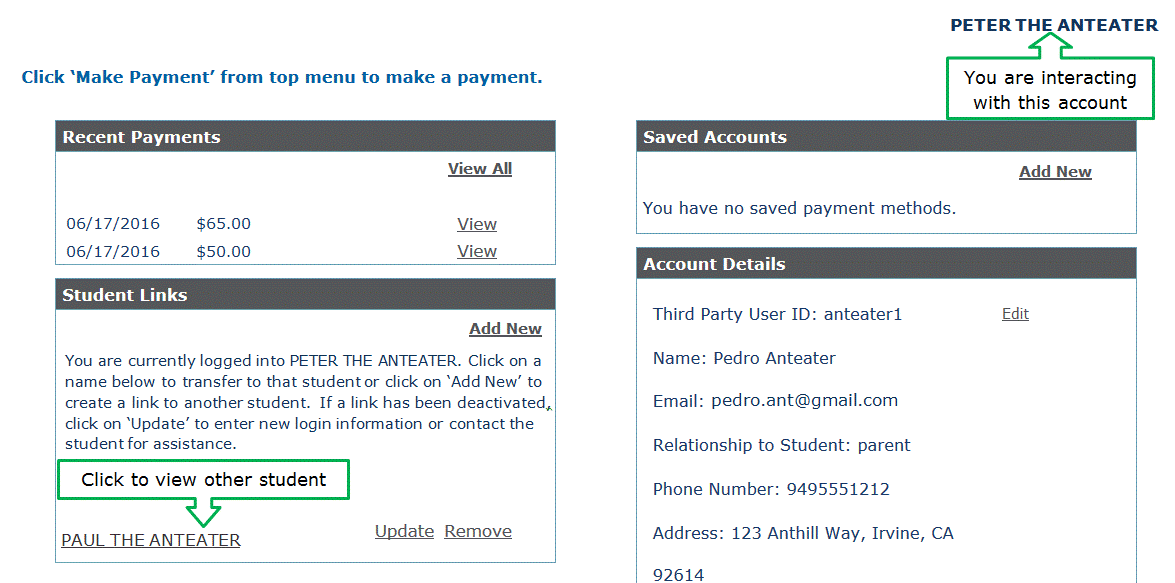
5. Verify the second/additional student’s name is added to your Student Links. Now you can switch the account you are viewing by clicking on the student’s link.
1. Login to CASHNet with your existing user ID and password.
2. Open the email generated when the second/additional student reset your password. Find the new login information. You need this information to update the link. DO NOT use this user ID and password to login to CASHNet.
3. You are working with the student account named in the upper-right corner of the page. Click on "My Account" in the menu. The account page is divided into four sections. In the Student Links section, the second/additional student is listed; however you cannot click on the name to switch accounts. Click the "Update" link next to the student’s name.
4. The user ID is pre-filled, so just enter the temporary password from the reset email. Click "OK" to save the information and update your link to the second/additional student’s account.

5. Verify the second/additional student’s link is active again. Now you can switch the account you are viewing by clicking on the student’s link.
1. Click "My Account" in the menu. The account page is divided into four sections. In the Student Links section, click the "Remove" link next to the entry you wish to delete.

2. A pop-up prompt appears. Click "OK" to confirm removing the selected Student Link. There is no further warning. If you change your mind, click "Cancel" to escape the removal process.

3. Verify that the student is no longer listed in the Student Links section.

Back to Sign Up Tutorial for Other Payers
ZOTBill FAQ | CASHNet Payments for Multiple Students | Add, Edit, or Delete a Payment Method in CASHNet
This page was last updated 08/23/2016